Today’s websites are slow. They are dynamic and complex applications. Pages are rendered on the fly in the browser using content downloaded from APIs. They are implemented using JavaScript and CSS frameworks, and they rely on external dependencies, such as fonts, trackers, and other crap we put on websites today.
A site’s performance is affected by several factors. Page-load or server-response times are useful metrics to measure the overall performance of a page, but they don’t provide analysis about what causes a site to be slow.
Lighthouse is one of the most useful tools to measure a website’s performance and to get a detailed report on the site’s potential for improvement. It’s also a great way to learn about current best practices. Lighthouse is available for the command line, as a browser extension or via Google’s PageSpeed Insights, which uses Lighthouse in the back.
In the age of continuous integration, we’re aiming to cut down manual QA in favour of continuous automated testing. Every commit is automatically tested; code quality standards are ensured using linters, and deployment is automated. Automation cuts down the need for repeated, dull manual labour and reduces errors made by bored humans. Lighthouse-like performance testing should be integrated into the same workflow. Enter Lighthouse CI.
Lighthouse CI is a set of commands that allow running Lighthouse in a continuous integration environment to run performance regression tests against every build. That way, we can ensure that any change committed to production doesn’t negatively affect your site’s performance. It allows us to specify thresholds that need to be met to make a build pass, and it creates the same detailed reports we know from other Lighthouse applications. These reports can be uploaded to a public storage for developers to review the results. Lighthouse CI also comes with a server instance that accepts Lighthouse data and creates advanced reports, including diffs to previous test runs and historical records.
Setting up Lighthouse CI is straightforward. I have used it on CircleCI; the example below outlines a setup for CircleCI. Lighthouse CI’s documentation provides examples for other environments.
I wanted to run Lighthouse against a production-like environment (unlike a local development server, as many examples suggest). The workflow runs unit tests and code lint first, then deployment to a staging environment, and finally, Lighthouse against that staging service. The CircleCI config looks like the following:
workflows:
  version: 2
  test-and-deploy:
    jobs:
      - test
      - lint
      - deploy-staging:
          requires:
            - test
            - lint
       - lighthouse:
           requires:
             - deploy-staging
It also doesn’t take much to set up the lighthouse job itself:
jobs:
  lighthouse:
    docker:
      - image: circleci/node:10-browsers
    steps:
      - checkout
      - run: sudo npm install -g @lhci/cli@0.3.x
      - run: lhci autorun —config=./.lighthouserc.json
We need a browser installed to run Lighthouse, so we’re using a Docker image that includes Node and a bunch of browsers. After checking out the repository, we’re installing the Lighthouse CI CLI and then run Lighthouse using the specified config.
The config is a JSON document, which specifies what URLs to test, the test criteria, and where to upload results. In the example below, two pages are tested three times each. The result is an aggregated score to even out inconsistent results due to server and network latencies. For simplicity, we’re using the default test criteria and opt-out of offline support and service workers, which we don’t support. The test results are uploaded to a free temporary online store, which currently is the only other option if you don’t run your own Lighthouse CI server.
{
  "collect": {
    "numberOfRuns": 3,
    "url": [
      "http://staging.somesite.com/apply/",
      "http://staging.somesite.com/other/"
    ]
  },
  "assert": {
    "preset": "lighthouse:recommended",
    "assertions": {
      "works-offline": "off",
      "service-worker": "off",
      "offline-start-url": "off"
    }
  },
  "ci": {
    "upload": {
      "target": "temporary-public-storage"
    }
  }
}
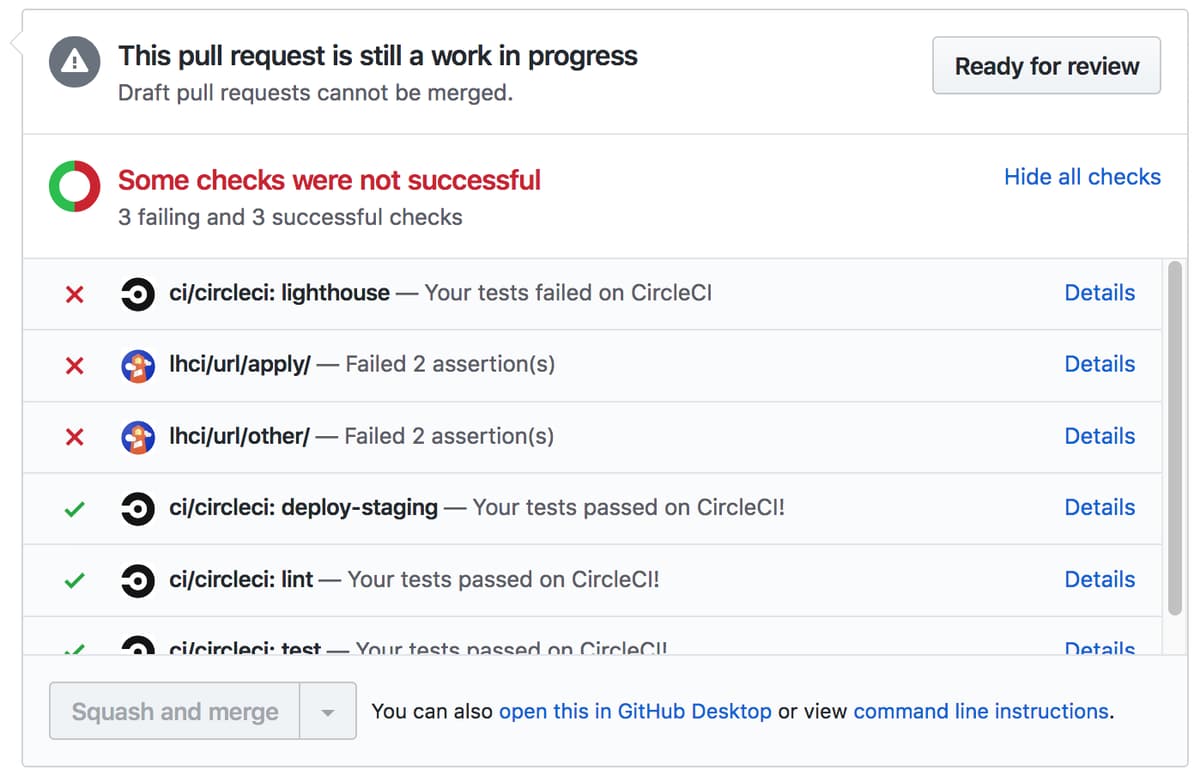
Specifying an upload target all enables notifications to GitHub, and you’ll get a helpful report on test statuses in your pull request.

Lighthouse CI is a great way to continuously monitor the performance of a website and to ensure performance-affecting changes won’t creep in and add up over time.